Members and Groups Masterclass: Part 3
When creating and editing your profile pages, Members & Groups will become your new best friend, so over the next few days we’ll be talking you through how the page works and how to use it effectively.
Now we have got our profile groups set up, and our members joined, we will focus on how to create some profile pages in the book!

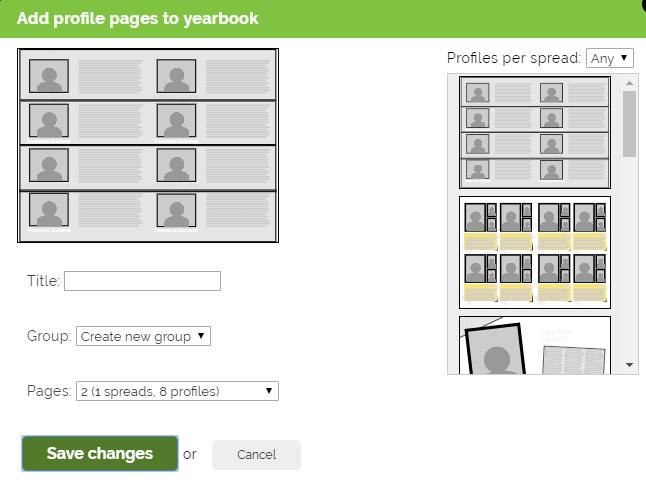
When you are ready to add some profile pages into your book you will first need to click on ‘Add Pages’ in the top left of the grey toolbar on your homepage. Then, select ‘Profiles‘.
First thing to do is to name your page, and then you will want to select a profile group to appear (use the drop down menu to choose from your created groups).

Next, you will want to move to the right hand side of the pop up box, where the different layouts are listed. Here you can filter the different layouts by how many profiles appear per spread.
Once you have selected the profile spread you like, you will need to select how many pages you want to add. You can do this by using the drop down box called ‘Pages’.
The ‘2’ refers to how many single pages will be added, while spreads points out how many double pages are being created. If you know how many profiles you will need in total, eg 30, you can also select this.
——————————————————————-
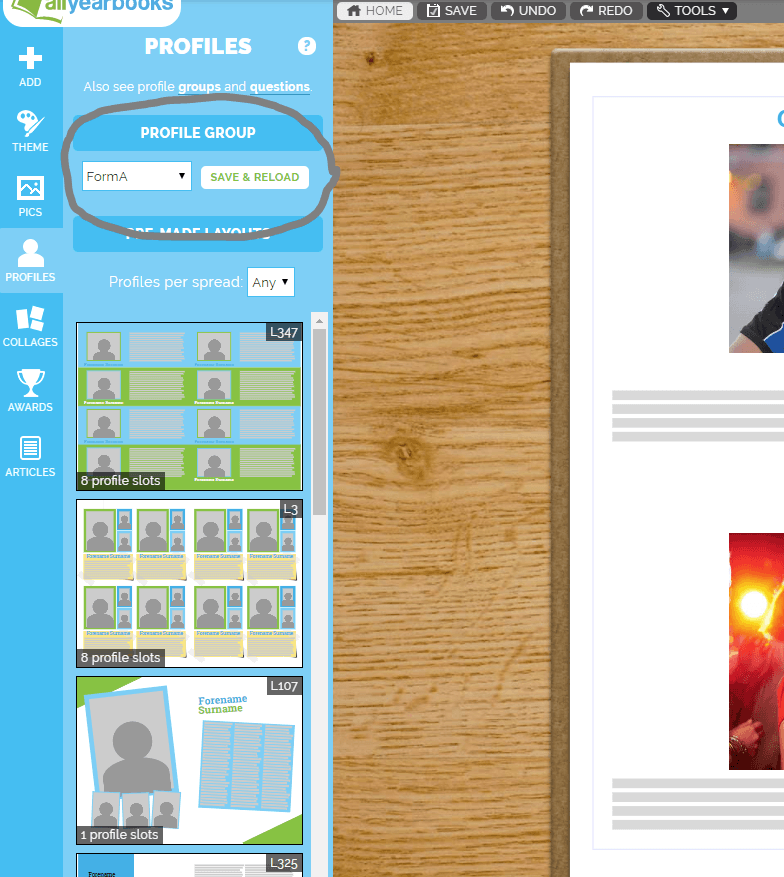
Now you have added profile pages into your book, you may need to change which profile group it is showing. This is easily done by clicking on the page you would like to change, and then selecting ‘Profiles’ in the blue page menu.

You’ll want to click on the drop down menu under ‘Profile Group‘. Here, you can select a different group and save the changes. You’ll also be able to change to a different profile layout on this page.
Tomorrow we’ll talk about how to add profile questions and awards for your members to answer!
Previous Members & Groups Articles:
Part One: Making Profile Groups